1. Introduction
Based on a simple Order Management sample application, this tutorial shows how easily OMNIA Platform models can be used through our API, by external applications.
On the first tutorial area we are going to evaluate how an API client is defined on OMNIA Platform, and how it is configured on OMNIAs security system. On the second area we are going to see a simple example of how OMNIA API can be consumed.
As a tool to consume OMNIA API, we are going to use Postman, a tool that simplifies interaction with APIs. It is worth noting that the API could be consumed as easily with other tools or your own developments using your preferred programming language. Download Postman
2. Prerequisites
This tutorial assumes that you have created a OMNIA tenant, and have completed the beginner tutorial. You must also have access to a user with privileges to Modeling and Management areas
If you do not have a tenant yet, please follow the steps of the Tenant Creation tutorial. If you have a tenant, but have not completed the beginner tutorial, follow the steps on Beginner tutorial.
3. Define an API Client
-
Start by logging in with a user that has access to the manage area, and right side of top navbar, select option “Management”. You will be redirected to the Management area
-
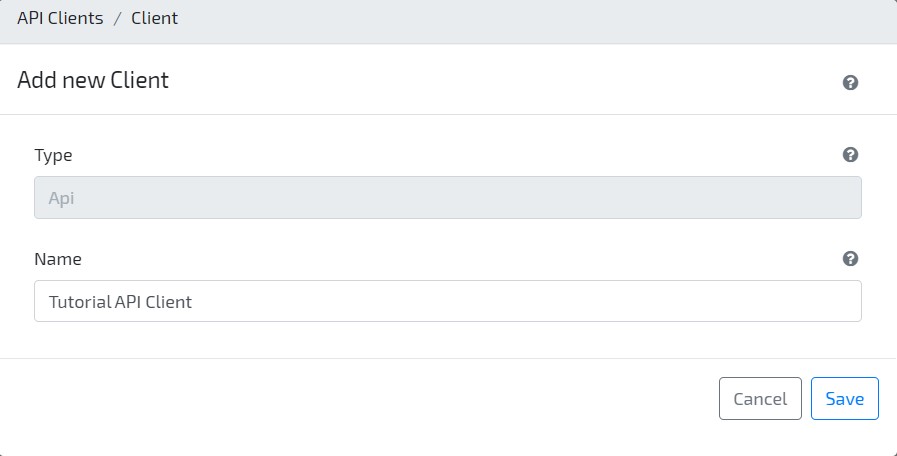
Through the left side menu, create a new API Client by accessing the option API Clients / Add new / API on the top right side. Set its Name as “Tutorial API Client”
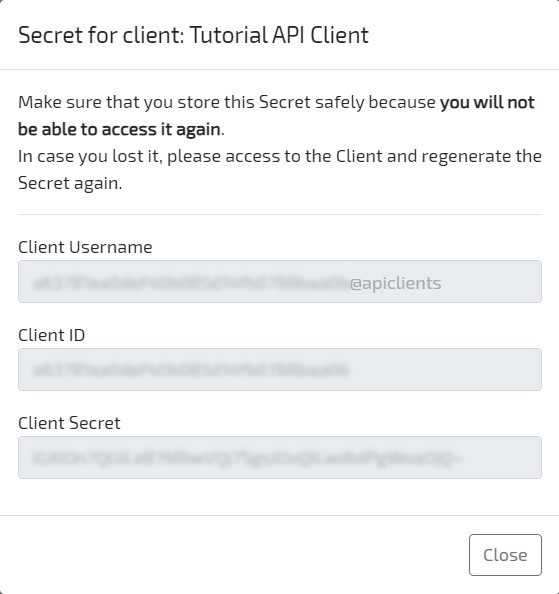
Right after creating, a modal should be shown with the Client Username, ID and Secret that you’ll use to consume OMNIA API. Copy the Client Username, ID and Secret to a safe location.
-
Now its time to define the access privileges for the API Client. Through the left side menu, access option “Security > Roles”. Locate the tenant Administration role (composed by the tenant code with prefix “Administration”. E.g. AdministrationDemoTenant).
-
Edit the role, and on tab “Users”, click on button “Add new”. Paste the Client Username copied on step 2 and click on Save
4. Consume OMNIA API
-
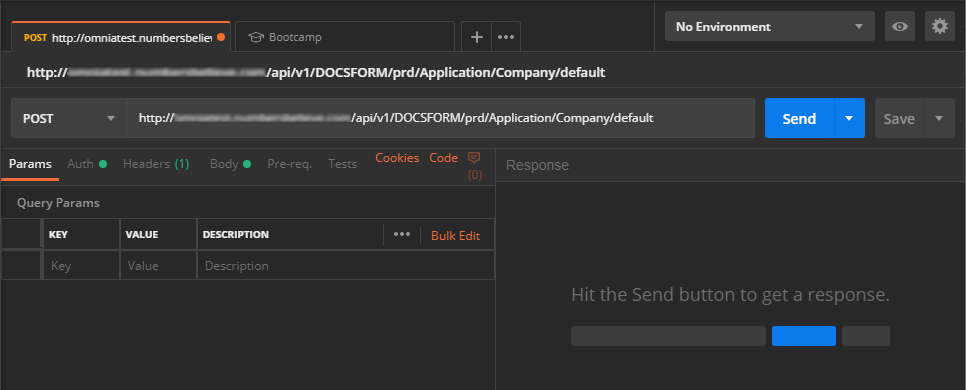
To consume the OMNIA API, open the previously installed Postman application. We are going to start with a POST request, to create a new Company.
-
Set the request type as “POST” and the request url as the base url used to access OMNIA (i.e. https://omnia.example.com/), then add “api/v1/[TenantCode]/prd/Application/Company/default” at the end (in this URL, replace “[TenantCode]” with your actual tenant code that shows up in the platform’s URLs).
-
Before creating a request to OMNIA API, configure OAuth 2.0 as the authentication type to be used on requests, and fill the required parameters, as in the following images:
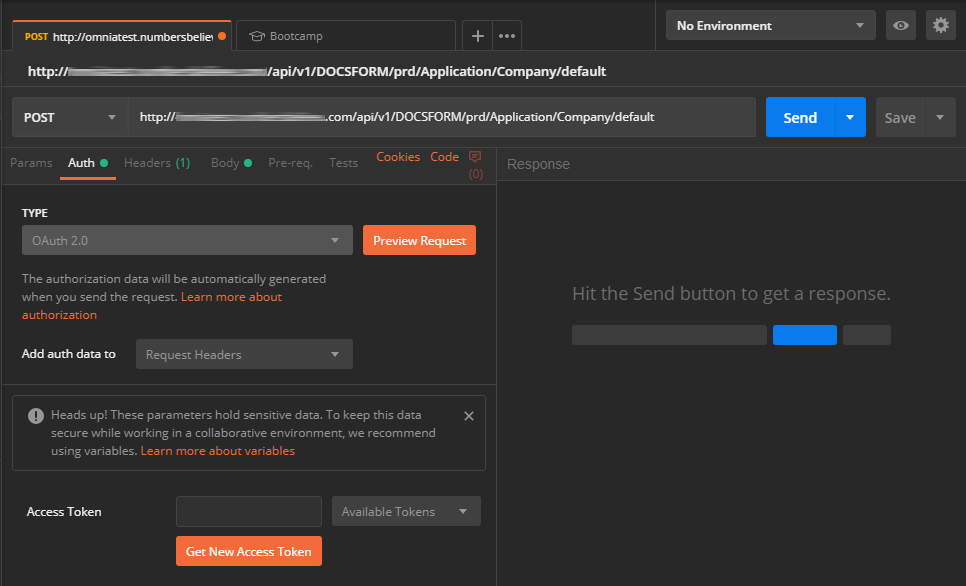
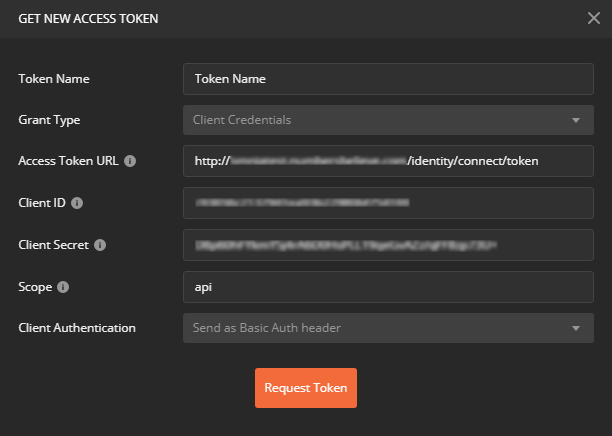
- Grant Type: Set as “Client Credentials”
- Access token URL: The base url used to access OMNIA, adding “/identity/connect/token” at the end
- Client ID: client ID generated previously
- Client Secret: secret generated previously.
- NOTE: Postman doesn’t support Client Id and Secret urlencoded when using Basic Auth header. To workaround this issue, you can urlencode the required fields (Client ID and Client Secret in this case) manually by right-clicking on the field and selecting EncodeURIComponent option. Click here to follow up the state of this issue.
- Scope: set as “api”
- Client Authentication: set as “Send as Basic Auth header”
-
Copy the following Json as the request body:
````{ “_code”:”AnalogSound”, “_name”:”Analog Sound Inc.” }
````
<p align="center"> <img src="/images/tutorials/apiclient/POSTresponse.jpg"> </p> -
Click on send and check the OMNIA API’s response. If request was made successfully, a 201 Created status code is the expected result. Validate the response - it should return a JSON object showing what was created.

-
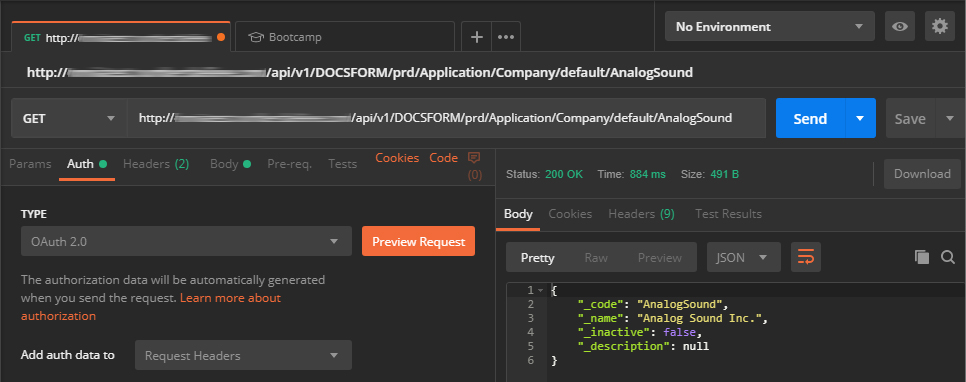
Now change the request type to GET, and retrieve the Company record saved on the last step by setting the request url as the base url, with “api/v1/[TenantCode]/prd/Application/Company/default/AnalogSound” at the end. Replace “[TenantCode]” with your actual tenant code.
-
Check that the response body has the data previously inserted on the POST request:
Now that you have completed our API Client tutorial, feel free to explore our API by testing other requests. Remember that the Modeling area is also available via API, so that you can create and change your models programmatically.
Also remember that the platform’s API is automatically documented directly on your installation of it. For more information on this, check this page.