1. Introduction
As a continuation of our Application Behaviours Tutorial, this tutorial shows how easily OMNIA can use and combine information from different data sources. In order to understand how this works, please read this section of the documentation.
On the first tutorial area (CRUD Operations), we are going to evaluate how to interact with an external data source, by reading and manipulating its data. On the second area (Add Employee Selection to Purchase Document), we are going to focus on the application of the new developed elements to our existing document, to mimic a real world scenario of attribution of a document to an employee.
As our custom data source, we are going to use a free API named ReqRes, that simulates real time CRUD operations, based on a user management scenario.
Please notice that, since this is only a simulation, no actual data is manipulated (written, updated or removed) on REQRES’s system. However, the code shown will be easily convertible to real-world scenarios.
2. Prerequisites
This tutorial assumes that you have created a OMNIA tenant, and are logged in as a user with modeling privileges to this tenant.
If you do not have a tenant yet, please follow the steps of the Tenant Creation tutorial.
3. CRUD operations
-
Start by selecting the tenant where you are going to model, and you will be redirected to the modeling area (if you only have one tenant, redirection will be automatic).
-
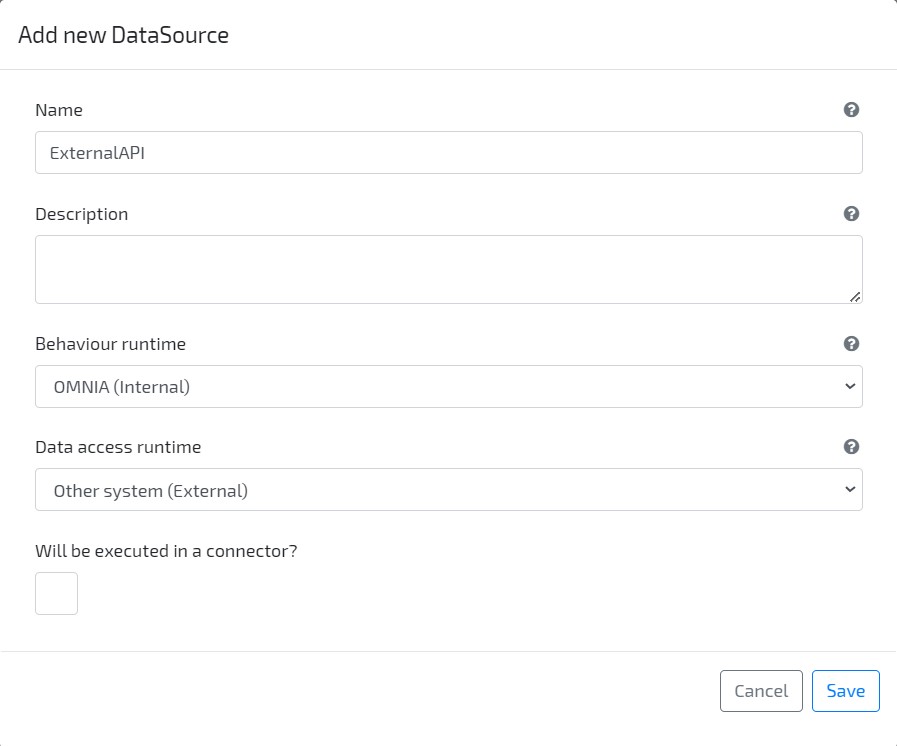
Through the left side menu, create a new Data Source by accessing the option Business / Data Sources on the top right button Add new. Set its Name as “ExternalAPI”, Behaviour Runtime as Internal and its Data Access Runtime as External. Leave it as not requiring a connector.
-
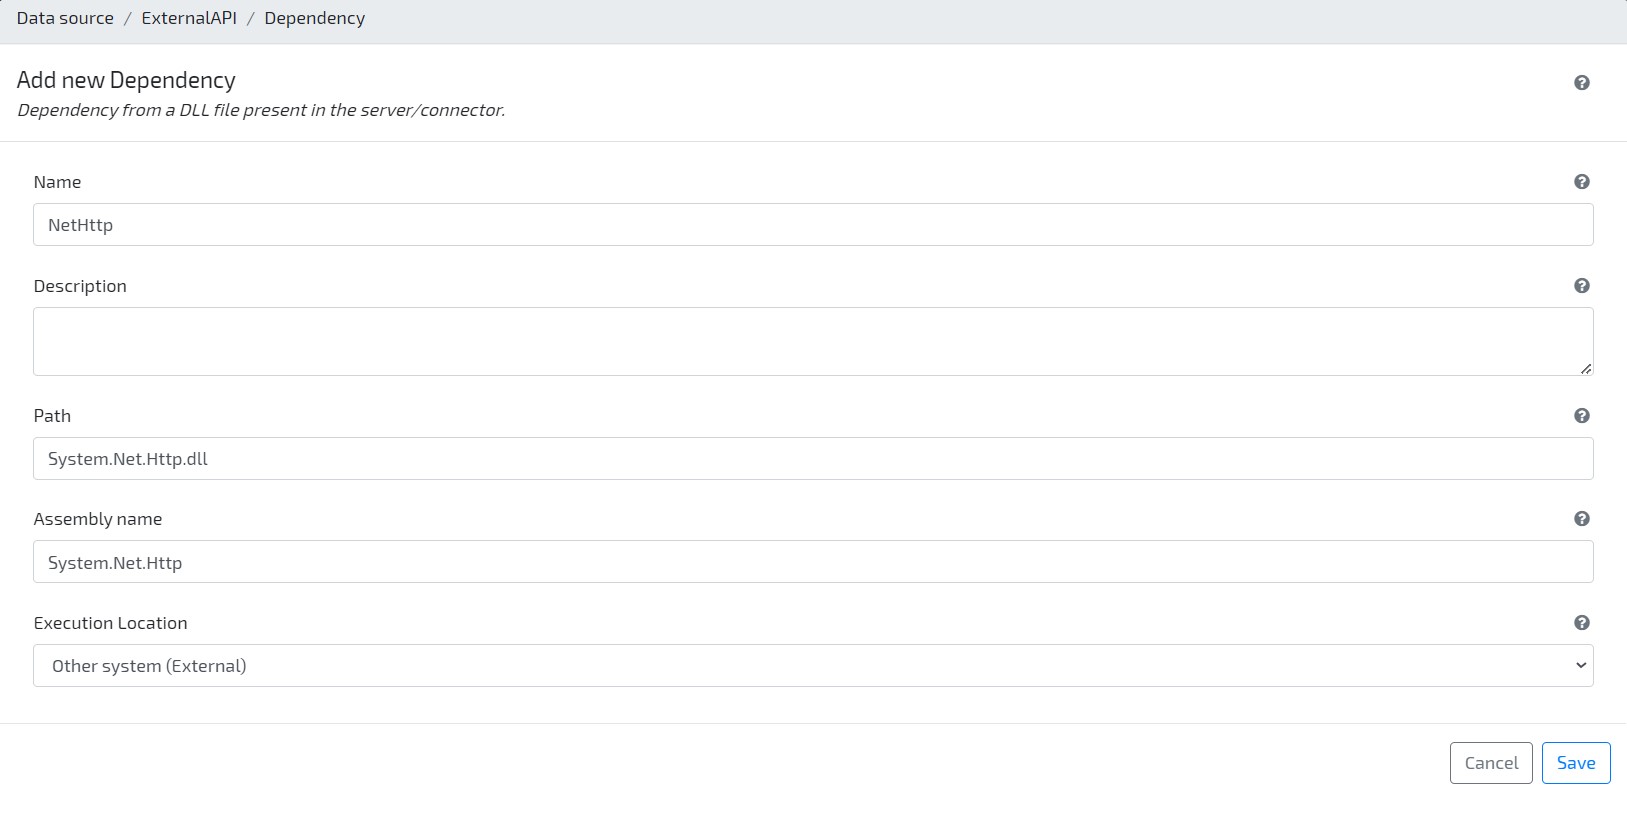
Navigate to tab Behaviour Dependencies and add a new File Dependency reference to .NET assembly System.Net.Http
-
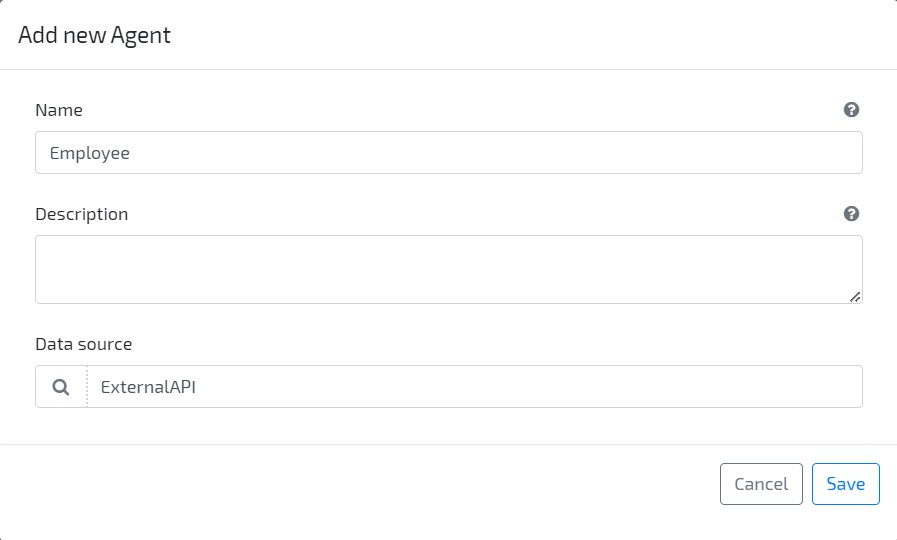
Create a new Agent with Name “Employee”, and set it as using the external data source “ExternalAPI” that you created earlier.
-
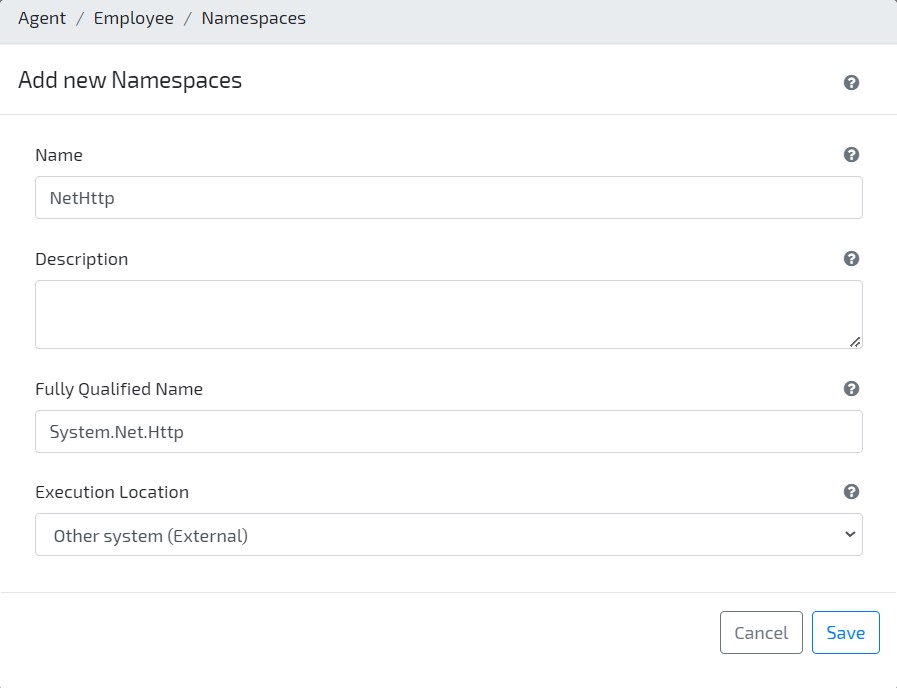
Navigate to tab Behaviour Namespaces and add a reference to namespace System.Net.Http
-
Still on Agent Employee, navigate to tab Data Behaviours, and define the C# code to be executed on Create. This behaviour will be used to perform a POST request to the external Application when we create an instance of the Employee on the OMNIA platform. Copy and paste the following code:
var client = new System.Net.Http.HttpClient(); string apiEndpoint = $"https://reqres.in/api/users/"; var body = new { code = dto._code, name = dto._name }; var jsonBody = JsonConvert.SerializeObject(body); var httpContent = new System.Net.Http.StringContent(jsonBody, System.Text.Encoding.UTF8, "application/json"); var requestResult = await client.PostAsync(apiEndpoint, httpContent); string responseBody = await requestResult.Content.ReadAsStringAsync(); if (!requestResult.IsSuccessStatusCode) throw new Exception($"Error on creating Employee: {responseBody}"); var response = JsonConvert.DeserializeObject<Dictionary<string, object>>(responseBody); EmployeeDto employeeResponse = new EmployeeDto(); employeeResponse._code = response["code"].ToString(); employeeResponse._name = response["name"].ToString(); return employeeResponse; -
On “Data Behaviours” of Agent Employee, define the code to be executed on Delete (when a Employee is deleted on OMNIA). Copy and paste the following code:
var client = new System.Net.Http.HttpClient(); string apiEndpoint = $"https://reqres.in/api/users/{identifier}"; var requestResult = await client.DeleteAsync(apiEndpoint); string responseBody = await requestResult.Content.ReadAsStringAsync(); if (!requestResult.IsSuccessStatusCode) throw new Exception($"Error on removing Employee: {responseBody}"); return true; -
Set the code for the operation Read, so that data is retrieved when a Employee is edited on OMNIA. Copy and paste the following code:
var client = new System.Net.Http.HttpClient(); string apiEndpoint = $"https://reqres.in/api/users/{identifier}"; var requestResult = await client.GetAsync(apiEndpoint); string responseBody = await requestResult.Content.ReadAsStringAsync(); if (!requestResult.IsSuccessStatusCode) throw new Exception($"Error on reading Employee {identifier}: {responseBody}"); var response = JsonConvert.DeserializeObject<Dictionary<string, object>>(responseBody); var responseData = JsonConvert.DeserializeObject<Dictionary<string, object>>(response["data"].ToString()); EmployeeDto employeeResponse = new EmployeeDto(); employeeResponse._code = responseData["id"].ToString(); employeeResponse._name = $"{responseData["first_name"].ToString()} {responseData["last_name"].ToString()}"; return employeeResponse; -
Set the code for the operation ReadList, so that data is retrieved when a list of Employees is requested. Copy and paste the following code:
var client = new System.Net.Http.HttpClient();
string apiEndpoint = $"https://reqres.in/api/users?page={page}";

var requestResult = await client.GetAsync(apiEndpoint);

string responseBody = await requestResult.Content.ReadAsStringAsync();

if (!requestResult.IsSuccessStatusCode)
    throw new Exception($"Error on creating Employee: {responseBody}");

var response = JsonConvert.DeserializeObject<Dictionary<string, object>>(responseBody);
var responseData = JsonConvert.DeserializeObject<List<Dictionary<string, object>>>(response["data"].ToString());

List<IDictionary<string, object>> employeesList = new List<IDictionary<string, object>>();

foreach (var employee in responseData)
{
    var line = new Dictionary<string, object>(){
        {"_code", employee["id"]},
        {"_name", $"{employee["first_name"]} {employee["last_name"]}"}
    };
    employeesList.Add(line);
}

return (responseData.Count, employeesList);
NOTE: in this scenario, we are ignoring the query sent by the user when obtaining the list. In real world scenarios, you will want to change the query to the external system and/or the returned response, according to the parameters sent by the user.
-
At last, set the code for the operation Update, so that data is retrieved when an Employee is updated on OMNIA (i.e., edited and saved). Copy and paste the following code:
var client = new System.Net.Http.HttpClient(); string apiEndpoint = $"https://reqres.in/api/users/{dto._code}"; var body = new { code = dto._code, name = dto._name }; var jsonBody = JsonConvert.SerializeObject(body); var httpContent = new System.Net.Http.StringContent(jsonBody, System.Text.Encoding.UTF8, "application/json"); var requestResult = await client.PutAsync(apiEndpoint, httpContent); string responseBody = await requestResult.Content.ReadAsStringAsync(); if (!requestResult.IsSuccessStatusCode) throw new Exception($"Error on updating Employee {dto._code}: {responseBody}"); var response = JsonConvert.DeserializeObject<Dictionary<string, object>>(responseBody); EmployeeDto employeeResponse = new EmployeeDto(); employeeResponse._code = response["code"].ToString(); employeeResponse._name = response["name"].ToString(); return employeeResponse; -
Build & Deploy model
-
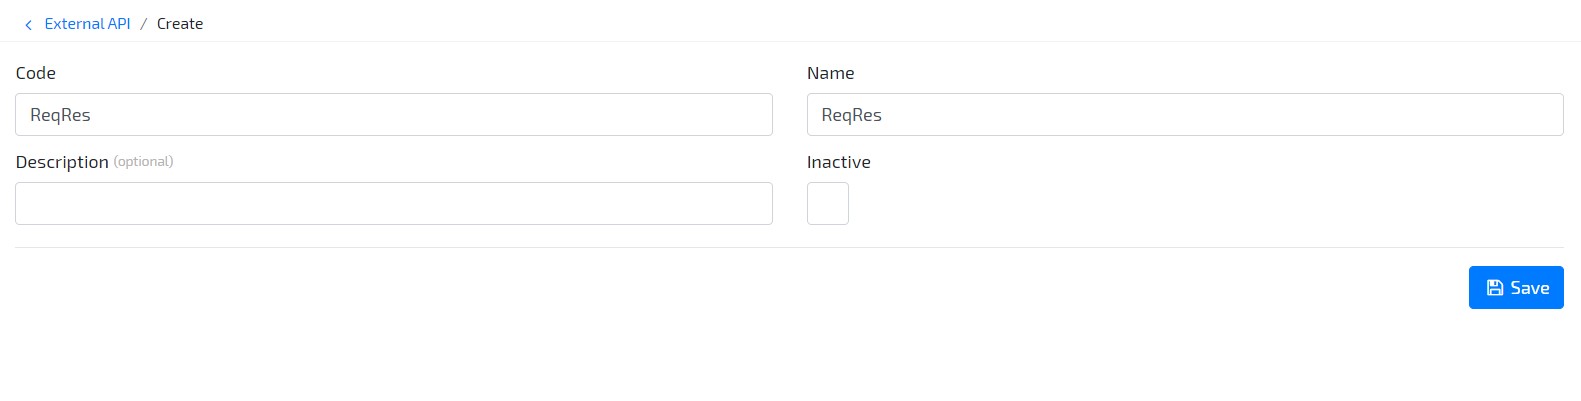
On Application area, create a new instance of the ExternalAPI data source (Configurations > ExternalAPI), with code “ReqRes”.
-
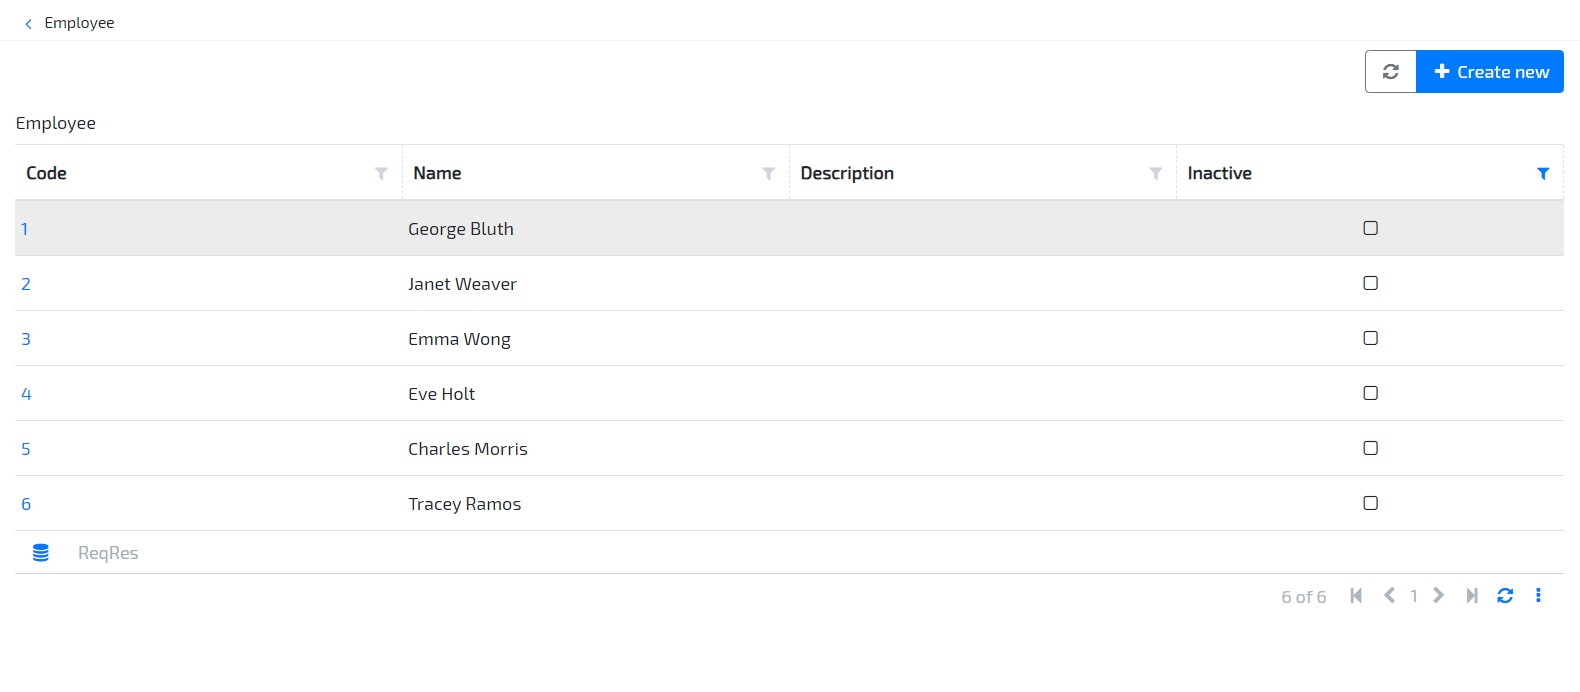
On left side menu, navigate to Configurations / Employee, and check that the list is filled with data retrieved from the external data source.
4. Add Employee to Purchase Document
-
To add an Employee (Agent) to our Purchase Document and assign a user responsible for it we’ll need to go back to the Modeler and add three new attributes to our Purchase Order Document. Access the document and create the following attributes:
Reference Attribute for External API
- Name: ExternalAPI
- Type: Data Source > External API
Reference Attribute for “Employee”
- Name: Employee
- Type: Agent > Employee
- Uses data source from attribute: ExternalAPI
Primitive Attribute for Employee Name
- Name: EmployeeName
- Type: Text
- is read only?: Yes
- Label: Requested by employee: (edit Form “PurchaseOrderForm” to change labels)
-
Now let’s add an entity behaviour (OnChange - Employee) to our document, so that our employee selection fills the “EmployeeName” field automatically. Select the “Get Entity” accelerator and make sure you have the following configuration:
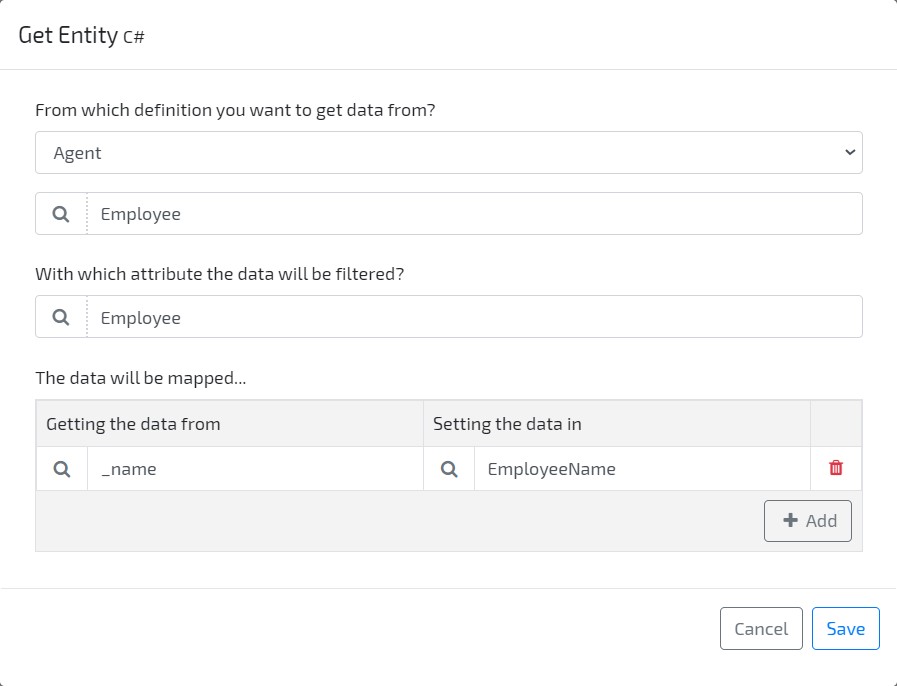
- Entity Behaviour Name: “OnChange_Employee”
-
Add Data Source to Accelerator Code:
// Code generated by an accelerator (you can change it if you need)
// The following code invokes the API to retrieve the data of an entity and set the values in the current entity
if(string.IsNullOrEmpty(this.Employee?.ToString()))
   return;

// In order to prevent to invoke the API if the values were sent by the user
if(
this._Dto.HasPropertyChanged(nameof(this.EmployeeName))
)
   return;

var httpClient = this._Context.CreateApplicationHttpClient();

//EXTERNAL DATA SOURCE
var dataSource = this.ExternalAPI; // Replace with the data source instance you want to query

var requestResult = httpClient.GetAsync($"Employee/{dataSource}/{this.Employee}").GetAwaiter().GetResult();

if (!requestResult.IsSuccessStatusCode)
   throw new Exception($"Can't retrieve the entity '{this.Employee}'");

var entity = requestResult.Content.ReadAsAsync<EmployeeDto>().GetAwaiter().GetResult();

this.EmployeeName = entity._name;
-
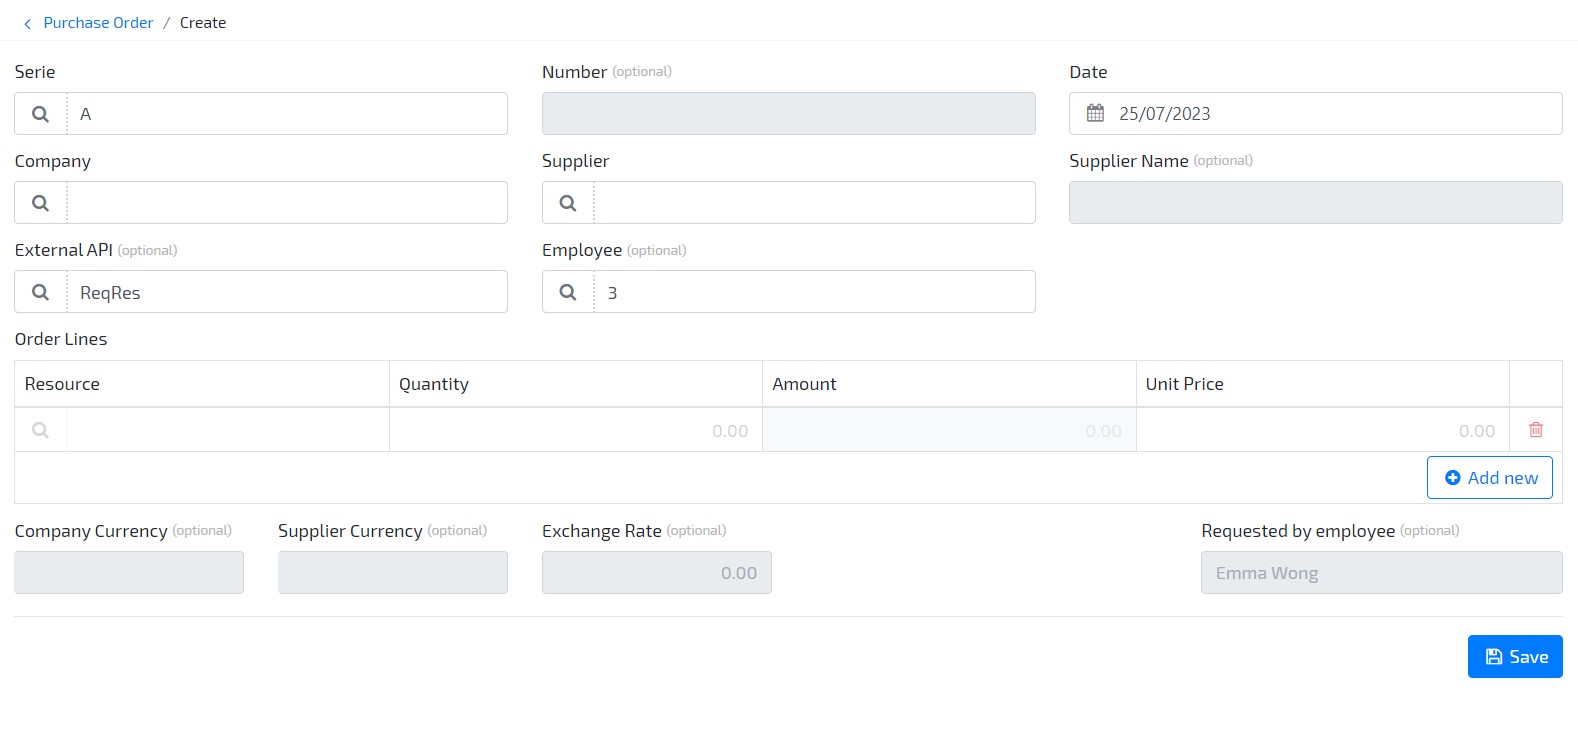
Build & Deploy and go to your application, create a new Purchase Order Document, select the available External API, and select one of the three available employees. Check that the “Requested by employee” field fills automatically, as demonstrated in the image bellow:
Now that you know how to use Data Sources, we recommend you to take a look at this tutorial where you will learn how to expose an on-premise Data Source to OMNIA.