1. Introduction
OMNIA’s Workflow Tutorial enhances your experience on OMNIA Platform 3.0, combining advanced elements and features from previous Tutorials with your daily workflow tools.
2. Prerequisites
This tutorial assumes that you have created a OMNIA tenant, and are logged in as a user with modeling privileges to this tenant.
3. Modeling a Workflow application
-
Start by selecting the tenant where you are going to model, and you will be redirected to the modeling area.

- Create a new Agent, and set its Code to Company.
-
Return to Agents / Add new, and set its Code as Employee.

- Create a new Resource, and set its Code to Task.
-
Access the option Versioning / Builds / Create new.
-
Proceed to the Application area, configure all figures previously defined, by selecting the option Configurations / Company / Create new, and defining its Code and Name.
-
Follow the same process of the previous step to create a new Employee and Task.
-
Go back to Modeling area and create a new Event with Code set as Executedtask, Task as the resource to be exchanged, Employee as provider agent, and Company as receiver agent.

-
Add a new Generic Entity, and set the code as Project.
-
Create a new Document, naming it as TaskReport.
-
Go to Data Analytics / Queries and create a query for your Event. Name it Executedtask_Query. Add a single property with alias Code for the path _code.
-
Access Data Analytics / Lists and create a new list. Set Executedtask_List as Code, the query created on first step (ExecutedtaskQuery) as the source of the list and Task as Label.

-
Add new columns to List. Add a column for Query Property Code, with Label Task, and format as Text

-
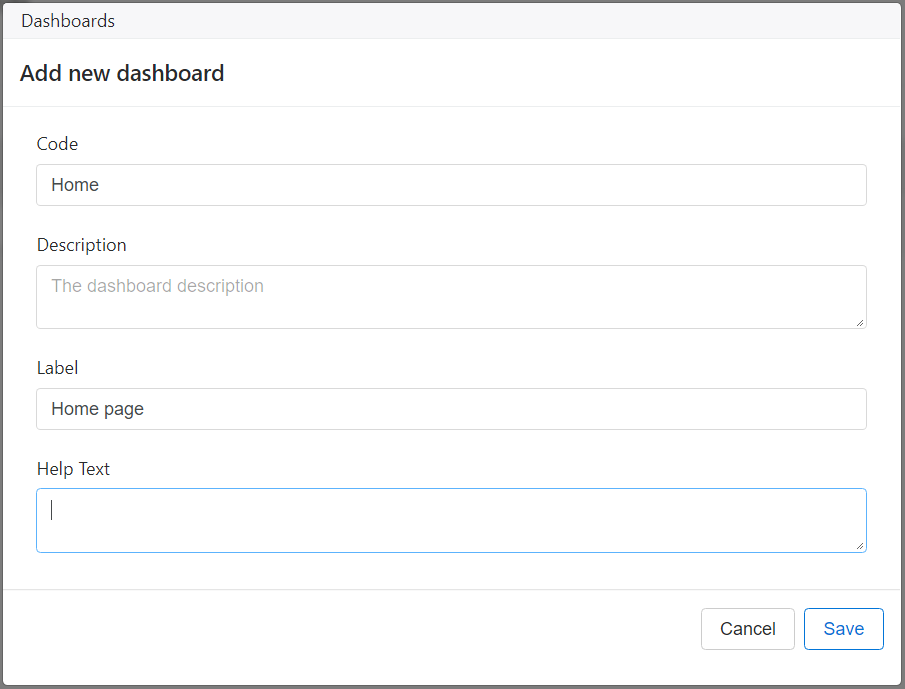
On Data Analytics / Dashboards, create a new dashboard and set Home as Code, so the dashboard will be visible on application’s homepage.
-
Add lists to Dashboard. Set Executedtask as Code, its List as Executedtask_List (created previously) and position it in the first Row and Column, with Size six. Set its label as Executed Tasks.
-
Perform a new Build (by accessing the option Versioning / Builds / Create new). Access the application and verify the homepage dashboard shows up.
-
Go back to the modeler and edit the TaskReport Document, by accessing Documents / TaskReport.
-
Add an new Attribute to your Document. Set its Code as Project, Type as Generic Entity / Project.
-
Add a new Attribute to your Document. Set its Code as Company, Type as Agent / Company , and as required by checking option Is required?.
-
Add a new Attribute to your Document. Set its Code as Employee, Type as Agent / Employee, and as required by checking option Is required?.
-
Add a new Attribute to your Document. Set its Code as EmployeeName, Type as Primitive / Text, and as read-only by checking option Is Read Only?.
-
Add a new Attribute to your Document. Set its Code as SheetID, Type as Primitive / Text, and as read-only by checking option Is Read Only?.
-
Add a new Attribute to your Document. Set its Code as ReportLines and Type as Event / ExecutedTask.

-
-
Go back to Generic Entity, and add a new Attribute to Project. Set its Code as SheetID, and its type as Primitive / Text.
-
Go to Events, and add a new Attribute to Executedtask. Set its Code as TaskDate, and its type as Primitive / Date.
-
Add another Attribute to Executedtask, setting its Code as Description, and its type as _ Primitive / Text_.
- Go to Google Sheets and create a new file. Generate an API key to access it. Make a note of the file’s ID, which you can obtain from the URL; for example, for the URL https://docs.google.com/spreadsheets/d/omniaID1234/edit#gid=0, the ID would be omniaID1234.
Copy the data from this file to the sheet you just created.
-
In the TaskReport document, go to tab Behaviours and click on Add new / Action. Set GetReportData as Code, SheetID as the attribute that triggers the behaviour, and paste the following code, taking care to replace the “INSERT YOUR KEY HERE” with the key obtained in the last step:
if (!string.IsNullOrEmpty(SheetID)) { var client = new System.Net.Http.HttpClient() {}; string googleApiKey = "INSERT YOUR KEY HERE"; string apiEndpoint = $"https://sheets.googleapis.com/v4/spreadsheets/{SheetID}/values/Sheet1?key={googleApiKey}"; var requestResult = client.GetAsync(apiEndpoint).GetAwaiter().GetResult(); string responseBody = requestResult.Content.ReadAsStringAsync().GetAwaiter().GetResult(); if (!requestResult.IsSuccessStatusCode) throw new Exception("Error on retrieving Google sheet: " + responseBody); var sheet = JsonConvert.DeserializeObject<Dictionary<string, object>>(responseBody); var values = JsonConvert.DeserializeObject<List<List<string>>>(sheet["values"].ToString()); for (int i = 2; i < values.Count; i++) //first two lines are headers { ExecutedTask taskLine = new ExecutedTask(_context, null); taskLine._resource = values[i].ElementAt(0); taskLine.TaskDate = Convert.ToDateTime(values[i].ElementAt(1)); taskLine.Description = values[i].ElementAt(2); taskLine._quantity = Convert.ToInt32(values[i].ElementAt(3)); ReportLines.Add(taskLine); } } -
In the TaskReport document, go to tab Behaviours and click on Add new / Action. Set GetSheetID as Code, Project as the attribute that triggers the behaviour, and paste the following code:
var project = ApiClient.Get(this.Context, "Project", newValue); SheetID = project["sheetID"].ToString(); -
In the TaskReport document, go to tab Behaviours and click on Add new / Action. Set GetEmployeeName as Code, Employee as the attribute that triggers the behaviour, and paste the following code:
var employee = ApiClient.Get(this.Context, "Employee", newValue); EmployeeName = employee["_name"].ToString(); -
Perform a new Build (by accessing the option Versioning / Builds / Create new).
-
Go to Application / Configurations area, and create a new Project. Set its SheetID attribute to the value we obtained earlier when setting up the Google Sheet.
-
Return to Application area, and create a new Taskreport Document. If Project has an associated and valid Google Sheet, your TaskReport lines will be automatically loaded.